Create, copy and edit a custom role
When none of the five built-in roles fits, create a custom role with exactly the permissions you want. The quickest way is usually to copy the closest built-in role and untick what's different.
Where to find it
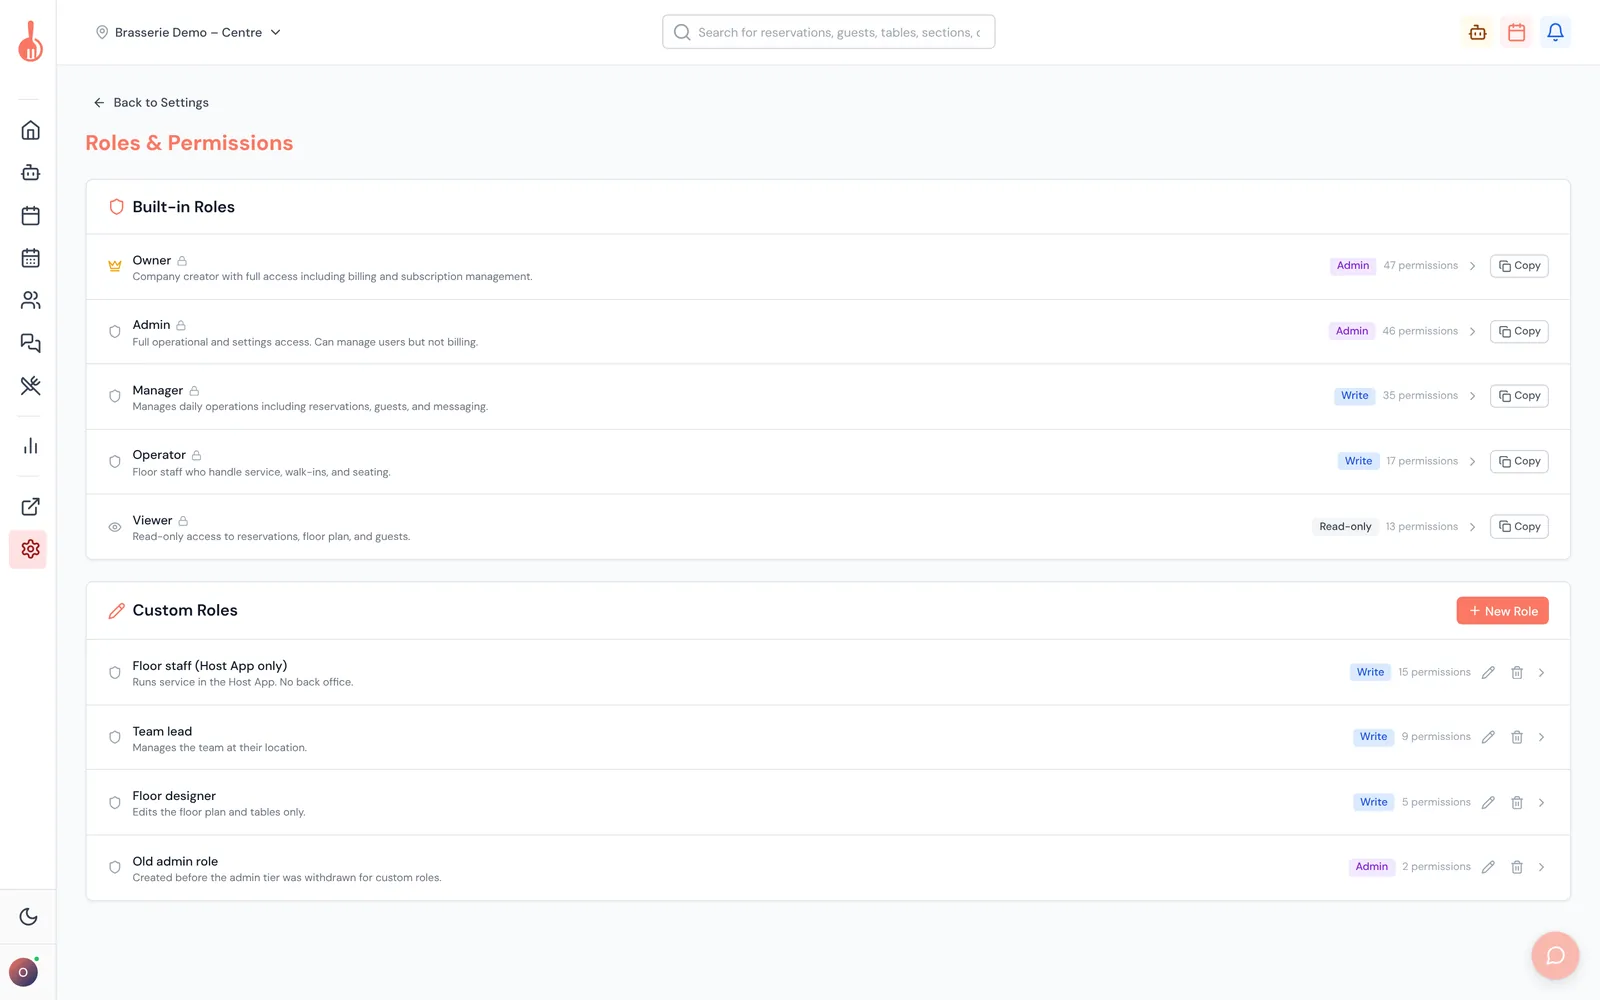
Backoffice › Settings › Account Management › Roles & Permissions. Built-in roles are at the top, custom roles under Custom Roles.
What it does
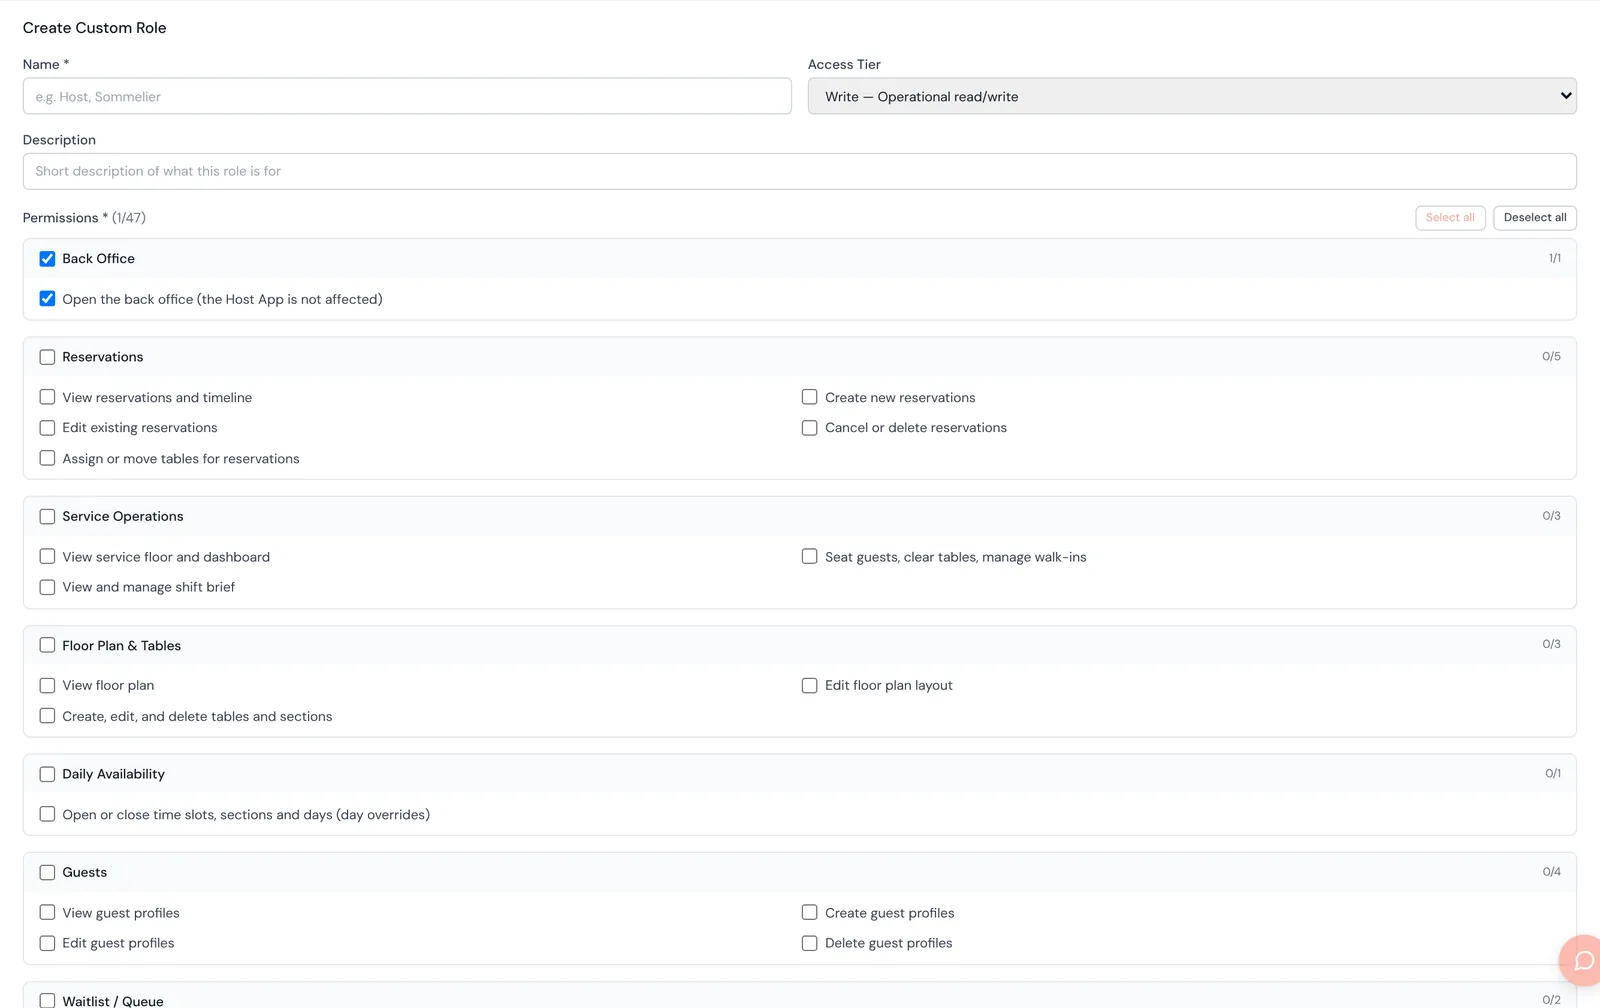
A custom role has a Name, an optional Description, an Access Tier and a list of permissions.
- Access Tier: Write ("Operational read/write") or Read ("View-only access"). Choose Read for someone who should only look. Admin is not offered for new custom roles.
- Permissions: tick each permission the role should have. The counter next to Permissions shows how many are ticked out of 47.
- Open the back office is ticked on every new role, so nobody is locked out of the Backoffice by accident. Untick it to keep the role in the Host App only.
How to create a custom role
- Click New Role.
- Enter a Name (for example "Host" or "Sommelier") and, optionally, a Description.
- Choose the Access Tier: Write or Read.
- Tick the permissions. See "Tick permissions faster" below.
- Click Create Role. The role appears under Custom Roles with its tier and number of permissions.
How to tick permissions faster
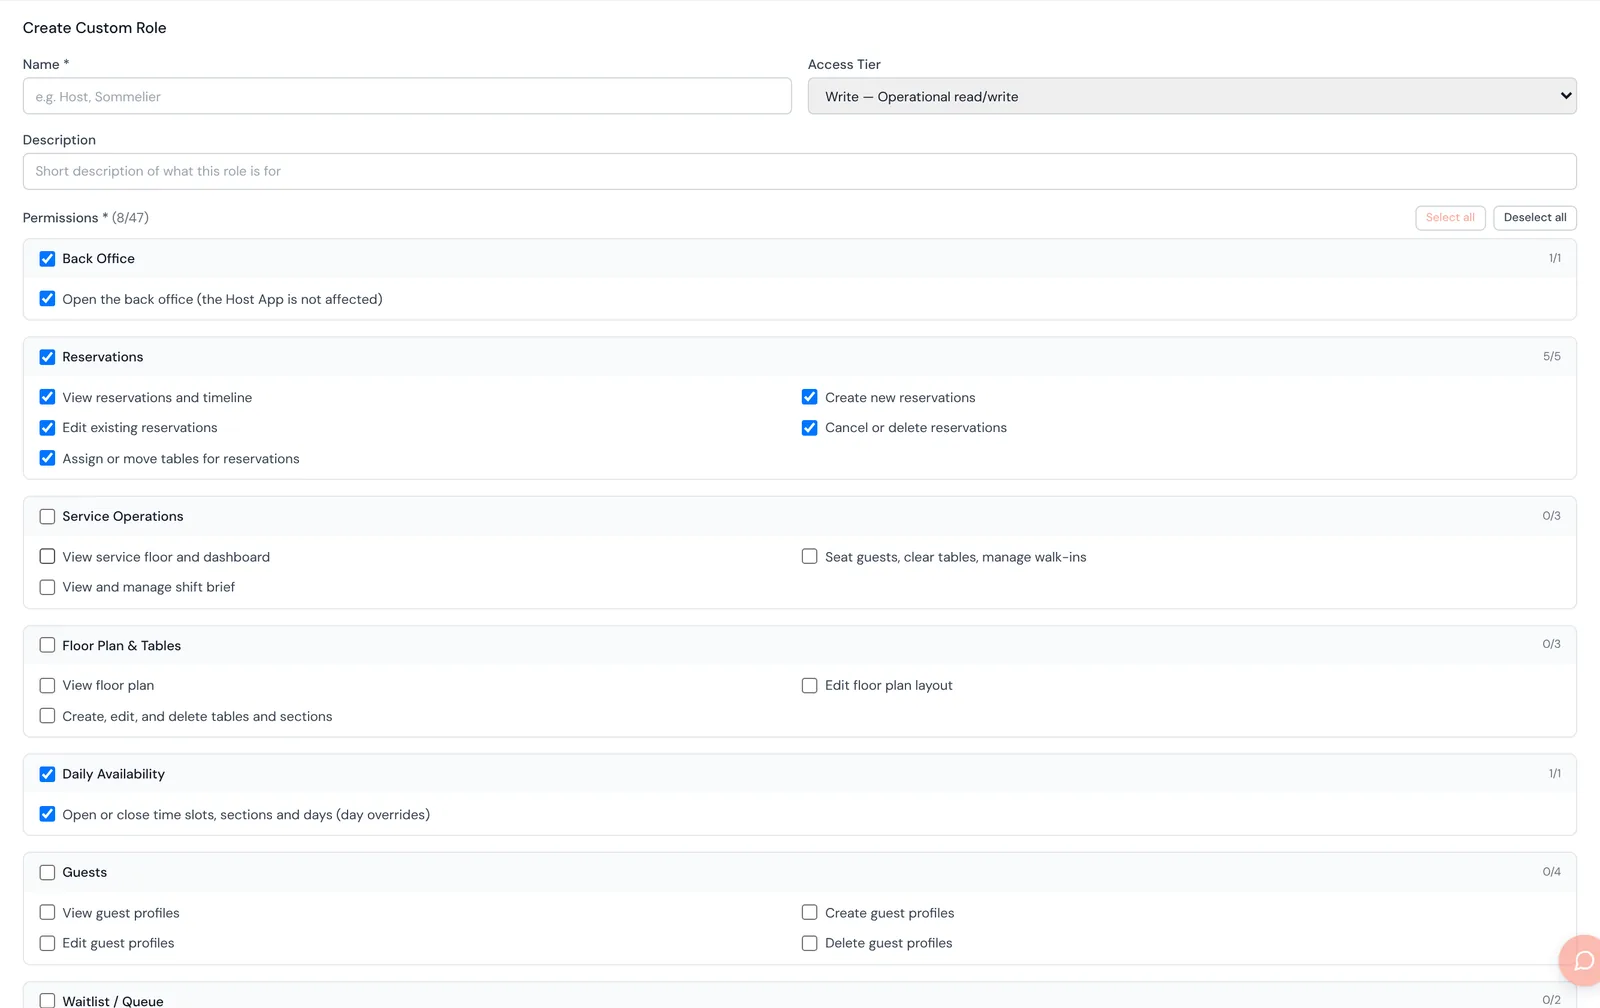
- Section checkbox. Each group heading (Reservations, Guests, Settings…) has its own checkbox. Click it to tick or clear the whole group.
- Partly ticked. When only some permissions in a group are ticked, the group checkbox shows a dash (–). Click it to tick the rest.
- Select all and Deselect all at the top work on every permission at once.

How to copy a built-in role
- Click Copy next to the built-in role that comes closest, for example Manager.
- The form opens with all of that role's permissions ticked and the name "Manager (copy)".
- Rename it, for example "Manager – no back office".
- Untick what's different. For example, untick Open the back office and Open or close time slots, sections and days (day overrides).
- Click Create Role.
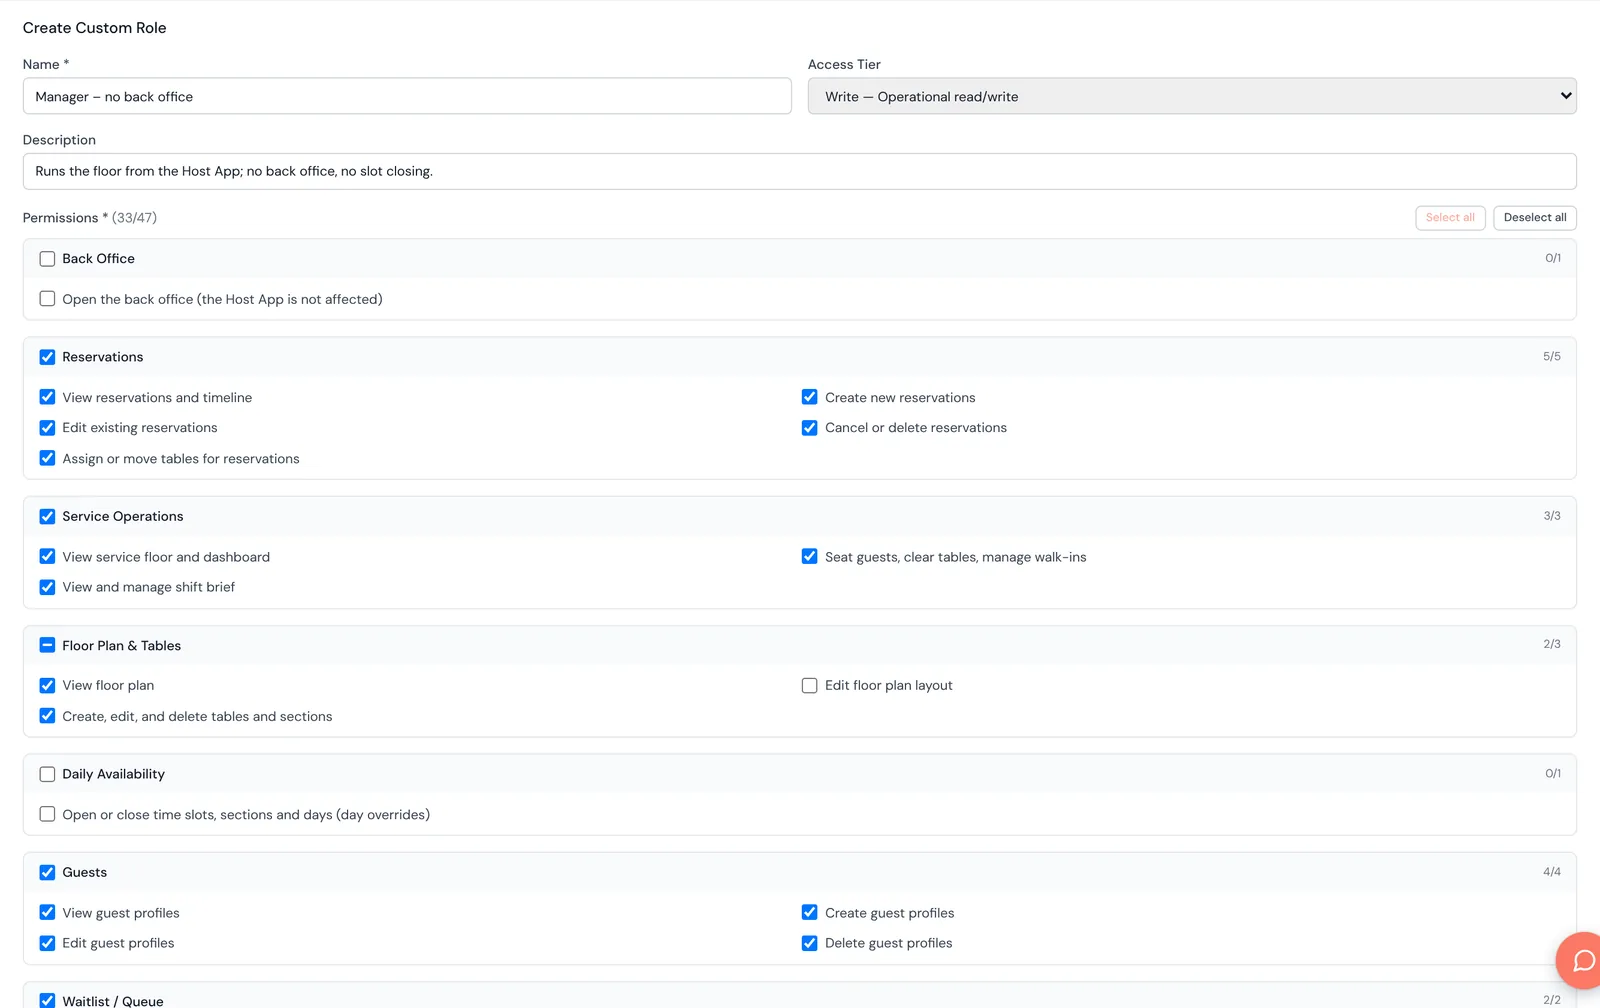
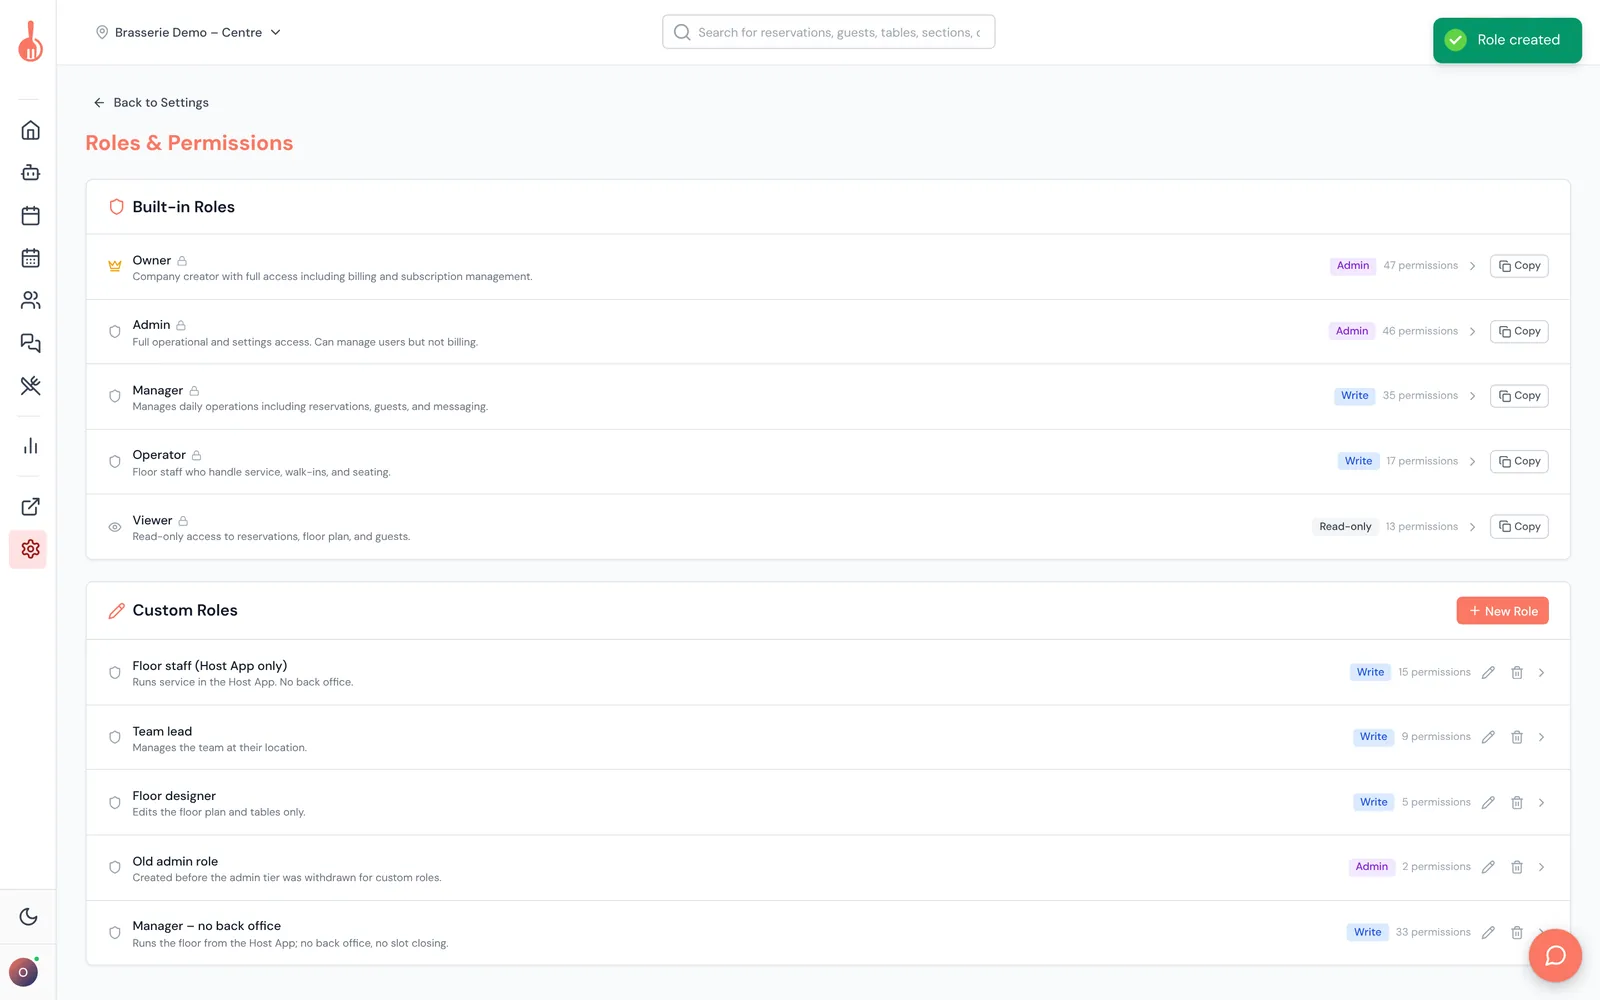
A copy is always Write tier, even when you copy Owner or Admin. Change it to Read if needed.
How to edit or delete a custom role
- Click the pencil icon on the role, change the name, tier or permissions and click Save Changes. People with that role get the new permissions the next time they sign in or reload.
- Click the bin icon to delete a role. You can only delete a role that nobody has. Give those people another role first.
Good to know
- Built-in roles can't be edited or deleted.
- Old Admin-tier custom roles. Custom roles made before the Admin tier was removed may still be Admin tier. Such a role gives full admin rights, whatever boxes are ticked. It shows as "Admin (legacy — no longer available for new roles)" with a notice. Move it to Write or Read so only the ticked permissions apply. You can move a role down from Admin, but never back up.
- The legacy Admin-tier roles are still offered when you invite someone or change their role. Giving one to someone gives them full admin rights. Move these roles to Write or Read to avoid surprises.

Troubleshooting
"Role name is required" / "Select at least one permission" Give the role a name and tick at least one permission.
"Cannot use reserved role name" The name matches a built-in role (owner, admin, manager, operator, viewer). Pick another name.
"A custom role with ID … already exists" A custom role with the same name already exists. Edit that one, or choose a different name.
"Cannot delete role … — N user(s) still assigned to it" Give those people another role in HQ › User Management, then delete it.
I can't choose Admin as the access tier Admin tier is no longer available for custom roles, because it ignored the ticked permissions. To give someone full admin rights, give them the built-in Admin role.
People on my new role can't open the Backoffice Open the back office is unticked on the role. Tick it and save, then ask them to reload.