Invite and manage team members
Give colleagues their own 10Seat login by inviting them by email. On the User Management page you see everyone on your team, their role, which location opens for them in the Host App, and invitations that are still pending.
Where to find it
Backoffice › Settings › Account Management › Users. The page title is User Management.
What it does
- Team Members lists active users with their Role, Host App location and Status, followed by pending invitations ("Pending Invitation", with the expiry date). The role shown is the person's role at the location you are viewing, and custom roles are shown by name.
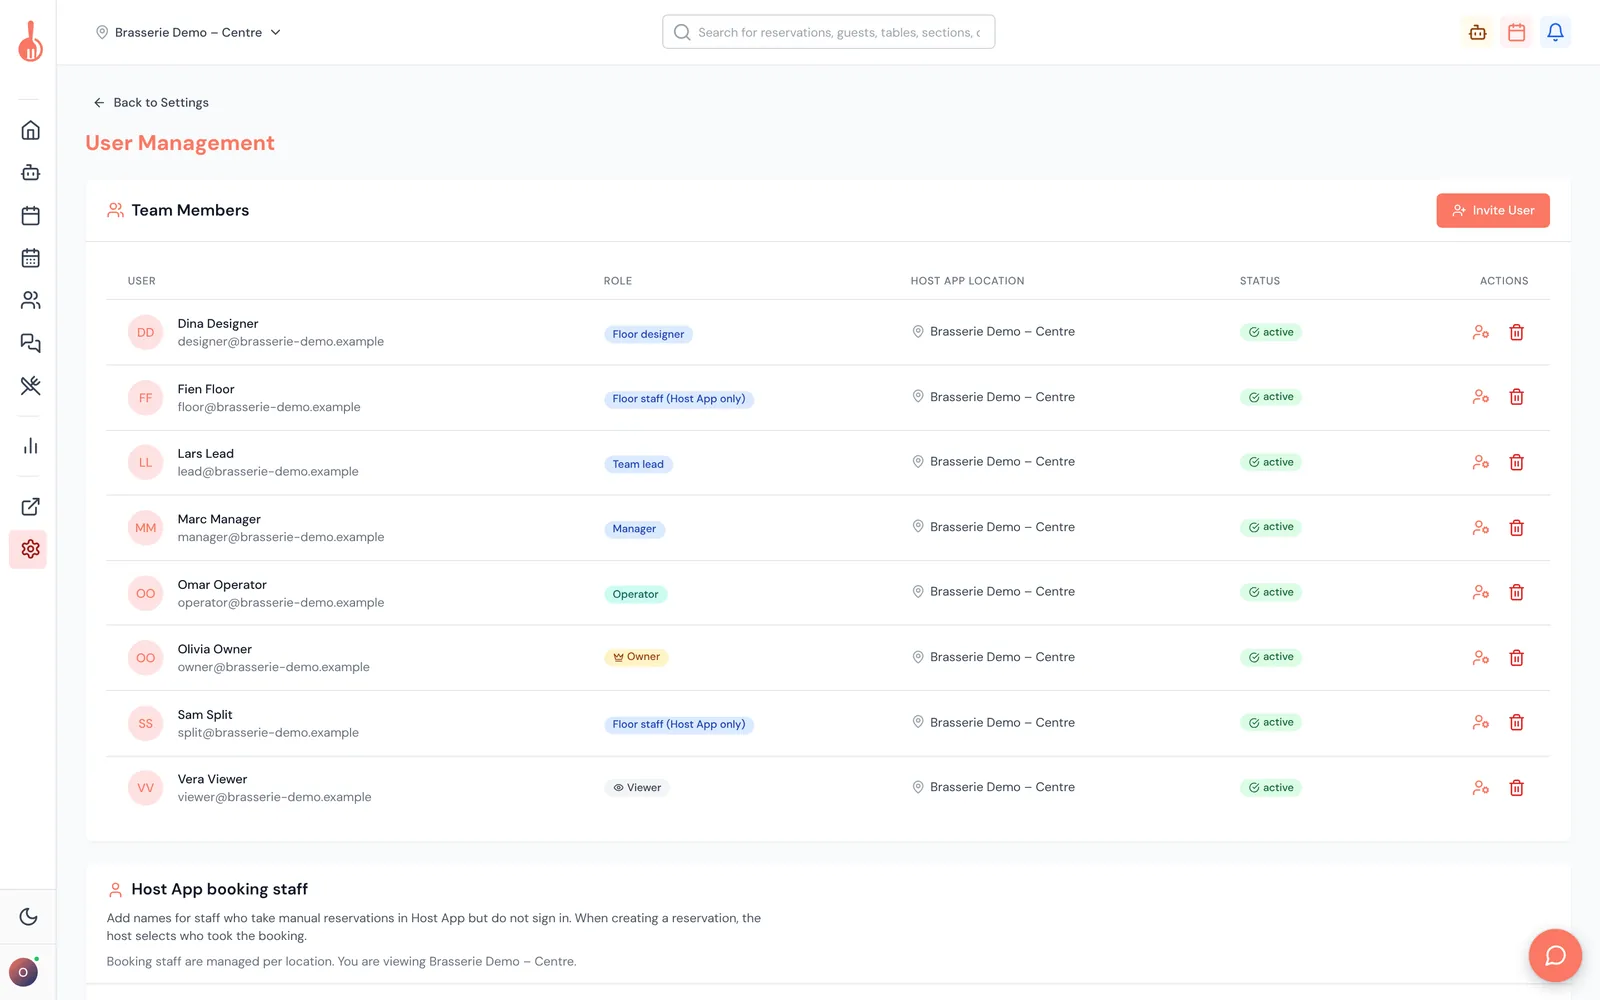
- Invite User sends an email invitation. The person picks their own password (see "Accept an invitation to join your team").
- The edit icon in a user's row sets their Host App location, the location that opens when they sign in to the Host App.
- Host App booking staff (lower on the page) is a list of names for staff who take bookings in the Host App but don't have their own login. See "Good to know".
How to invite a user
- Click Invite User.
- Fill in First Name, Last Name and Email Address.
- Choose a Role: Admin, Manager, Operator or Viewer, or one of your own roles under Custom Roles. Built-in roles show a short description. See "Roles and permissions explained".
- Under Locations, tick every location this person may access. The first one you tick becomes their Host App location.
- Click Send Invitation. You see "Invitation sent successfully" and the invitation appears in the list.
The invitation is valid for 7 days. To cancel it, click the X in its row.
How to set someone's Host App location
- Click the edit icon in the user's row.
- Choose a Primary location, or "None — Host App has no default location".
- Click Save.
Good to know
- One email address can only have one 10Seat login. You can't invite an address that already has one.
- Custom roles you create under Roles & Permissions are listed under Custom Roles in the invite form.
- Only Owners and Admins can invite someone as Admin or with an Admin-tier custom role.
- The Owner role can't be given by invitation.
- To change someone's role later, change which locations they can access, give a different role per location, or limit an admin to certain locations, use HQ › User Management (see "Give someone a role" and "Manage users across locations (HQ User Management)").
- Removing a user: the bin icon in a user's row doesn't work at the moment. To remove someone's access, contact 10Seat support.
- Booking staff names: use Add name to add a Display name (for example "Maria" or "Front desk"). Hosts then pick who took a booking in the Host App reservation form. Turn on Require attribution when booking to make that choice mandatory. Booking staff are managed per location. Managers can manage this list too.
Troubleshooting
"Only owners and admins can invite users" Your role can't send invitations. Ask your Owner or an Admin.
"Only company administrators can invite users" You are an admin for some locations only. Invitations must be sent by an admin with access to the whole company.
"A user with this email already exists" That email address already has a 10Seat login, maybe at another restaurant or from an earlier sign-up. Use a different email address, or contact 10Seat support.
"A pending invitation already exists for this email" An invitation is already waiting. Cancel it with the X in its row, then invite again to send a fresh email.
"Invitation created but email could not be sent" The invitation exists but the email failed. Cancel it and send it again. Ask the person to check their spam folder.
"Select at least one location" Tick at least one location under Locations.
"No locations found for this company. Create a location before inviting users." Your company has no location yet. Contact 10Seat support.
A colleague signed in but the Host App shows no floor They have no Host App location. Set one with the edit icon in their row.